Painting Over Wallpaper Atlanta: How to Choose the Safer Finish
Compare removal and coating strategies before committing to a finish that may expose every seam.
Compare removal and coating strategies before committing to a finish that may expose every seam. This guide explains deciding whether wallpaper should be removed or can be responsibly prepared for coating through a practical sequence built around real surfaces, clear scope, and durable results.
painting over wallpaper Atlanta: The Practical Answer
The dependable approach is to inspect before specifying, correct causes before cosmetics, and define the complete coating system before production. A useful plan connects surface condition, preparation, access, product, application, curing, and maintenance instead of treating paint as a decorative layer alone.
Impeccable Painting Services helps Metro Atlanta homeowners coordinate wallpaper removal, related repairs, and clean project logistics. Review our project gallery, learn about our painting company, or request an on-site estimate.
painting over wallpaper Atlanta: Identify the Wallcovering Type
For homeowners focused on deciding whether wallpaper should be removed or can be responsibly prepared for coating, Identify the Wallcovering Type deserves more attention than a quick visual check. A coating project is a connected system: the substrate, previous finish, moisture exposure, access, preparation, product, application, and drying conditions all influence one another. Decisions at this specific stage affect the appearance on completion day and how predictably the work performs afterward.
When reviewing Identify the Wallcovering Type, begin by observing the relevant surface in strong side light and under the lighting used in daily life. Record defects instead of assuming paint will hide them. Note open joints, glossy patches, stains, texture changes, loose material, previous touch-ups, and areas exposed to water or frequent handling. Photographs and a written room or elevation list turn observations about this step into a scope that a homeowner and contractor can discuss clearly.
How to evaluate this step
For Identify the Wallcovering Type, ask three questions: what condition exists now, what caused it, and what result is expected? The answer determines whether cleaning is enough or whether the assembly needs repair, sealing, sanding, priming, or specialist evaluation. Cosmetic work should not conceal active moisture, unstable material, or movement. When the cause is outside a painter's scope, resolving it first protects both the building and the new finish.
A professional proposal should translate the decisions surrounding Identify the Wallcovering Type into observable work. It should identify included surfaces, meaningful preparation, the coating category, excluded repairs, access assumptions, and the standard for completion. This detail makes estimates easier to compare and reduces changes during production. It also gives the crew a reliable plan rather than asking them to make scope decisions after rooms have already been disrupted.
Because Identify the Wallcovering Type will look different from one property to another, remember that Atlanta homes vary in age, construction, exposure, renovation history, and daily use. Test questionable areas, follow coating manufacturer instructions, allow required drying, and inspect before advancing. Patient sequencing at this stage is usually less costly than correcting adhesion, flashing, contamination, or visible repair edges later.
Inspect Seams, Bubbles, and Edges
For homeowners focused on deciding whether wallpaper should be removed or can be responsibly prepared for coating, Inspect Seams, Bubbles, and Edges deserves more attention than a quick visual check. A coating project is a connected system: the substrate, previous finish, moisture exposure, access, preparation, product, application, and drying conditions all influence one another. Decisions at this specific stage affect the appearance on completion day and how predictably the work performs afterward.
When reviewing Inspect Seams, Bubbles, and Edges, begin by observing the relevant surface in strong side light and under the lighting used in daily life. Record defects instead of assuming paint will hide them. Note open joints, glossy patches, stains, texture changes, loose material, previous touch-ups, and areas exposed to water or frequent handling. Photographs and a written room or elevation list turn observations about this step into a scope that a homeowner and contractor can discuss clearly.
How to evaluate this step
For Inspect Seams, Bubbles, and Edges, ask three questions: what condition exists now, what caused it, and what result is expected? The answer determines whether cleaning is enough or whether the assembly needs repair, sealing, sanding, priming, or specialist evaluation. Cosmetic work should not conceal active moisture, unstable material, or movement. When the cause is outside a painter's scope, resolving it first protects both the building and the new finish.
A professional proposal should translate the decisions surrounding Inspect Seams, Bubbles, and Edges into observable work. It should identify included surfaces, meaningful preparation, the coating category, excluded repairs, access assumptions, and the standard for completion. This detail makes estimates easier to compare and reduces changes during production. It also gives the crew a reliable plan rather than asking them to make scope decisions after rooms have already been disrupted.
Because Inspect Seams, Bubbles, and Edges will look different from one property to another, remember that Atlanta homes vary in age, construction, exposure, renovation history, and daily use. Test questionable areas, follow coating manufacturer instructions, allow required drying, and inspect before advancing. Patient sequencing at this stage is usually less costly than correcting adhesion, flashing, contamination, or visible repair edges later.

Look for Moisture and Staining
For homeowners focused on deciding whether wallpaper should be removed or can be responsibly prepared for coating, Look for Moisture and Staining deserves more attention than a quick visual check. A coating project is a connected system: the substrate, previous finish, moisture exposure, access, preparation, product, application, and drying conditions all influence one another. Decisions at this specific stage affect the appearance on completion day and how predictably the work performs afterward.
When reviewing Look for Moisture and Staining, begin by observing the relevant surface in strong side light and under the lighting used in daily life. Record defects instead of assuming paint will hide them. Note open joints, glossy patches, stains, texture changes, loose material, previous touch-ups, and areas exposed to water or frequent handling. Photographs and a written room or elevation list turn observations about this step into a scope that a homeowner and contractor can discuss clearly.
How to evaluate this step
For Look for Moisture and Staining, ask three questions: what condition exists now, what caused it, and what result is expected? The answer determines whether cleaning is enough or whether the assembly needs repair, sealing, sanding, priming, or specialist evaluation. Cosmetic work should not conceal active moisture, unstable material, or movement. When the cause is outside a painter's scope, resolving it first protects both the building and the new finish.
A professional proposal should translate the decisions surrounding Look for Moisture and Staining into observable work. It should identify included surfaces, meaningful preparation, the coating category, excluded repairs, access assumptions, and the standard for completion. This detail makes estimates easier to compare and reduces changes during production. It also gives the crew a reliable plan rather than asking them to make scope decisions after rooms have already been disrupted.
Because Look for Moisture and Staining will look different from one property to another, remember that Atlanta homes vary in age, construction, exposure, renovation history, and daily use. Test questionable areas, follow coating manufacturer instructions, allow required drying, and inspect before advancing. Patient sequencing at this stage is usually less costly than correcting adhesion, flashing, contamination, or visible repair edges later.
Test a Small Removal Area
For homeowners focused on deciding whether wallpaper should be removed or can be responsibly prepared for coating, Test a Small Removal Area deserves more attention than a quick visual check. A coating project is a connected system: the substrate, previous finish, moisture exposure, access, preparation, product, application, and drying conditions all influence one another. Decisions at this specific stage affect the appearance on completion day and how predictably the work performs afterward.
When reviewing Test a Small Removal Area, begin by observing the relevant surface in strong side light and under the lighting used in daily life. Record defects instead of assuming paint will hide them. Note open joints, glossy patches, stains, texture changes, loose material, previous touch-ups, and areas exposed to water or frequent handling. Photographs and a written room or elevation list turn observations about this step into a scope that a homeowner and contractor can discuss clearly.
How to evaluate this step
For Test a Small Removal Area, ask three questions: what condition exists now, what caused it, and what result is expected? The answer determines whether cleaning is enough or whether the assembly needs repair, sealing, sanding, priming, or specialist evaluation. Cosmetic work should not conceal active moisture, unstable material, or movement. When the cause is outside a painter's scope, resolving it first protects both the building and the new finish.
A professional proposal should translate the decisions surrounding Test a Small Removal Area into observable work. It should identify included surfaces, meaningful preparation, the coating category, excluded repairs, access assumptions, and the standard for completion. This detail makes estimates easier to compare and reduces changes during production. It also gives the crew a reliable plan rather than asking them to make scope decisions after rooms have already been disrupted.
Because Test a Small Removal Area will look different from one property to another, remember that Atlanta homes vary in age, construction, exposure, renovation history, and daily use. Test questionable areas, follow coating manufacturer instructions, allow required drying, and inspect before advancing. Patient sequencing at this stage is usually less costly than correcting adhesion, flashing, contamination, or visible repair edges later.
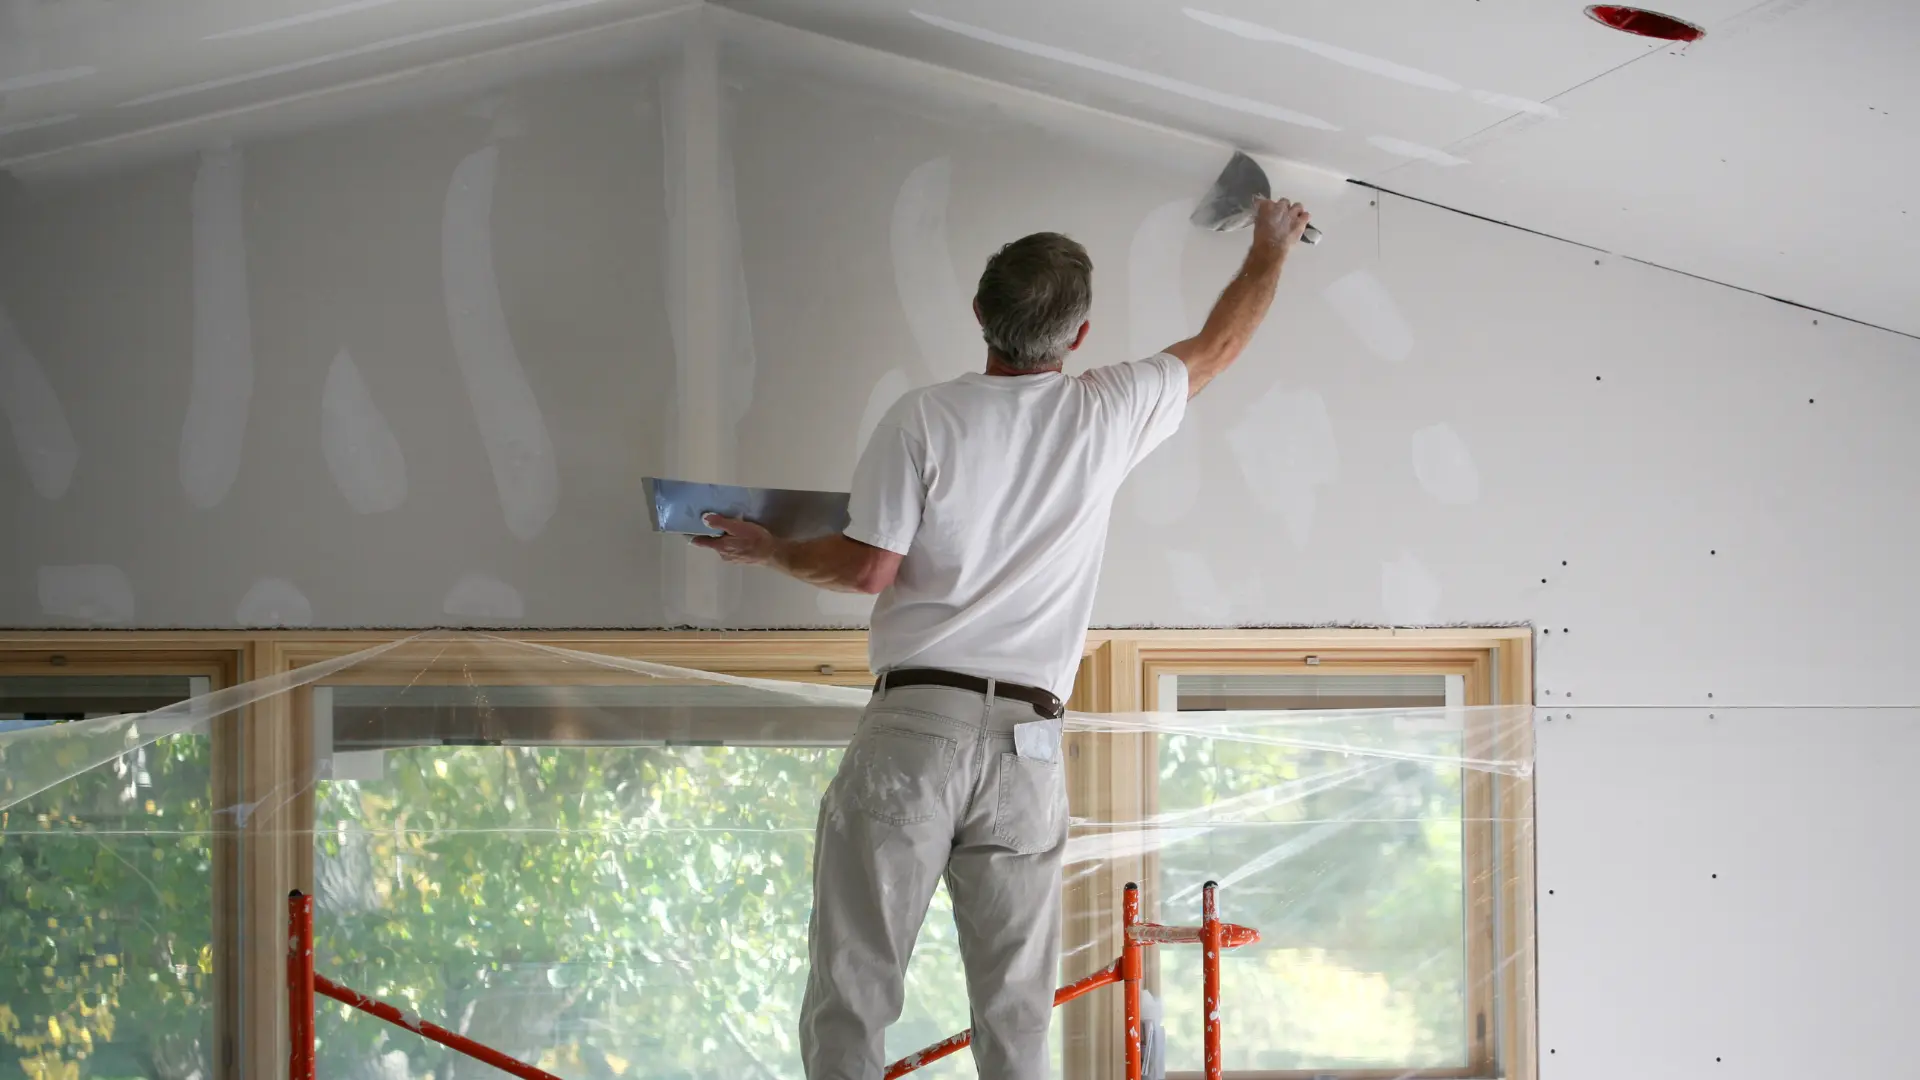
Understand the Wall Beneath
For homeowners focused on deciding whether wallpaper should be removed or can be responsibly prepared for coating, Understand the Wall Beneath deserves more attention than a quick visual check. A coating project is a connected system: the substrate, previous finish, moisture exposure, access, preparation, product, application, and drying conditions all influence one another. Decisions at this specific stage affect the appearance on completion day and how predictably the work performs afterward.
When reviewing Understand the Wall Beneath, begin by observing the relevant surface in strong side light and under the lighting used in daily life. Record defects instead of assuming paint will hide them. Note open joints, glossy patches, stains, texture changes, loose material, previous touch-ups, and areas exposed to water or frequent handling. Photographs and a written room or elevation list turn observations about this step into a scope that a homeowner and contractor can discuss clearly.
How to evaluate this step
For Understand the Wall Beneath, ask three questions: what condition exists now, what caused it, and what result is expected? The answer determines whether cleaning is enough or whether the assembly needs repair, sealing, sanding, priming, or specialist evaluation. Cosmetic work should not conceal active moisture, unstable material, or movement. When the cause is outside a painter's scope, resolving it first protects both the building and the new finish.
A professional proposal should translate the decisions surrounding Understand the Wall Beneath into observable work. It should identify included surfaces, meaningful preparation, the coating category, excluded repairs, access assumptions, and the standard for completion. This detail makes estimates easier to compare and reduces changes during production. It also gives the crew a reliable plan rather than asking them to make scope decisions after rooms have already been disrupted.
Because Understand the Wall Beneath will look different from one property to another, remember that Atlanta homes vary in age, construction, exposure, renovation history, and daily use. Test questionable areas, follow coating manufacturer instructions, allow required drying, and inspect before advancing. Patient sequencing at this stage is usually less costly than correcting adhesion, flashing, contamination, or visible repair edges later.
Plan Your Project With Confidence
Impeccable Painting Services can inspect the conditions, define the scope, and recommend a practical next step.
Request a Free Estimate Call 770-847-2468Compare Removal With Encapsulation
For homeowners focused on deciding whether wallpaper should be removed or can be responsibly prepared for coating, Compare Removal With Encapsulation deserves more attention than a quick visual check. A coating project is a connected system: the substrate, previous finish, moisture exposure, access, preparation, product, application, and drying conditions all influence one another. Decisions at this specific stage affect the appearance on completion day and how predictably the work performs afterward.
When reviewing Compare Removal With Encapsulation, begin by observing the relevant surface in strong side light and under the lighting used in daily life. Record defects instead of assuming paint will hide them. Note open joints, glossy patches, stains, texture changes, loose material, previous touch-ups, and areas exposed to water or frequent handling. Photographs and a written room or elevation list turn observations about this step into a scope that a homeowner and contractor can discuss clearly.
A Practical painting over wallpaper Atlanta Decision Framework
For Compare Removal With Encapsulation, ask three questions: what condition exists now, what caused it, and what result is expected? The answer determines whether cleaning is enough or whether the assembly needs repair, sealing, sanding, priming, or specialist evaluation. Cosmetic work should not conceal active moisture, unstable material, or movement. When the cause is outside a painter's scope, resolving it first protects both the building and the new finish.
A professional proposal should translate the decisions surrounding Compare Removal With Encapsulation into observable work. It should identify included surfaces, meaningful preparation, the coating category, excluded repairs, access assumptions, and the standard for completion. This detail makes estimates easier to compare and reduces changes during production. It also gives the crew a reliable plan rather than asking them to make scope decisions after rooms have already been disrupted.
Because Compare Removal With Encapsulation will look different from one property to another, remember that Atlanta homes vary in age, construction, exposure, renovation history, and daily use. Test questionable areas, follow coating manufacturer instructions, allow required drying, and inspect before advancing. Patient sequencing at this stage is usually less costly than correcting adhesion, flashing, contamination, or visible repair edges later.

Protect Paper-Faced Drywall
For homeowners focused on deciding whether wallpaper should be removed or can be responsibly prepared for coating, Protect Paper-Faced Drywall deserves more attention than a quick visual check. A coating project is a connected system: the substrate, previous finish, moisture exposure, access, preparation, product, application, and drying conditions all influence one another. Decisions at this specific stage affect the appearance on completion day and how predictably the work performs afterward.
When reviewing Protect Paper-Faced Drywall, begin by observing the relevant surface in strong side light and under the lighting used in daily life. Record defects instead of assuming paint will hide them. Note open joints, glossy patches, stains, texture changes, loose material, previous touch-ups, and areas exposed to water or frequent handling. Photographs and a written room or elevation list turn observations about this step into a scope that a homeowner and contractor can discuss clearly.
How to evaluate this step
For Protect Paper-Faced Drywall, ask three questions: what condition exists now, what caused it, and what result is expected? The answer determines whether cleaning is enough or whether the assembly needs repair, sealing, sanding, priming, or specialist evaluation. Cosmetic work should not conceal active moisture, unstable material, or movement. When the cause is outside a painter's scope, resolving it first protects both the building and the new finish.
A professional proposal should translate the decisions surrounding Protect Paper-Faced Drywall into observable work. It should identify included surfaces, meaningful preparation, the coating category, excluded repairs, access assumptions, and the standard for completion. This detail makes estimates easier to compare and reduces changes during production. It also gives the crew a reliable plan rather than asking them to make scope decisions after rooms have already been disrupted.
Because Protect Paper-Faced Drywall will look different from one property to another, remember that Atlanta homes vary in age, construction, exposure, renovation history, and daily use. Test questionable areas, follow coating manufacturer instructions, allow required drying, and inspect before advancing. Patient sequencing at this stage is usually less costly than correcting adhesion, flashing, contamination, or visible repair edges later.
Remove Residual Adhesive
For homeowners focused on deciding whether wallpaper should be removed or can be responsibly prepared for coating, Remove Residual Adhesive deserves more attention than a quick visual check. A coating project is a connected system: the substrate, previous finish, moisture exposure, access, preparation, product, application, and drying conditions all influence one another. Decisions at this specific stage affect the appearance on completion day and how predictably the work performs afterward.
When reviewing Remove Residual Adhesive, begin by observing the relevant surface in strong side light and under the lighting used in daily life. Record defects instead of assuming paint will hide them. Note open joints, glossy patches, stains, texture changes, loose material, previous touch-ups, and areas exposed to water or frequent handling. Photographs and a written room or elevation list turn observations about this step into a scope that a homeowner and contractor can discuss clearly.
How to evaluate this step
For Remove Residual Adhesive, ask three questions: what condition exists now, what caused it, and what result is expected? The answer determines whether cleaning is enough or whether the assembly needs repair, sealing, sanding, priming, or specialist evaluation. Cosmetic work should not conceal active moisture, unstable material, or movement. When the cause is outside a painter's scope, resolving it first protects both the building and the new finish.
A professional proposal should translate the decisions surrounding Remove Residual Adhesive into observable work. It should identify included surfaces, meaningful preparation, the coating category, excluded repairs, access assumptions, and the standard for completion. This detail makes estimates easier to compare and reduces changes during production. It also gives the crew a reliable plan rather than asking them to make scope decisions after rooms have already been disrupted.
Because Remove Residual Adhesive will look different from one property to another, remember that Atlanta homes vary in age, construction, exposure, renovation history, and daily use. Test questionable areas, follow coating manufacturer instructions, allow required drying, and inspect before advancing. Patient sequencing at this stage is usually less costly than correcting adhesion, flashing, contamination, or visible repair edges later.
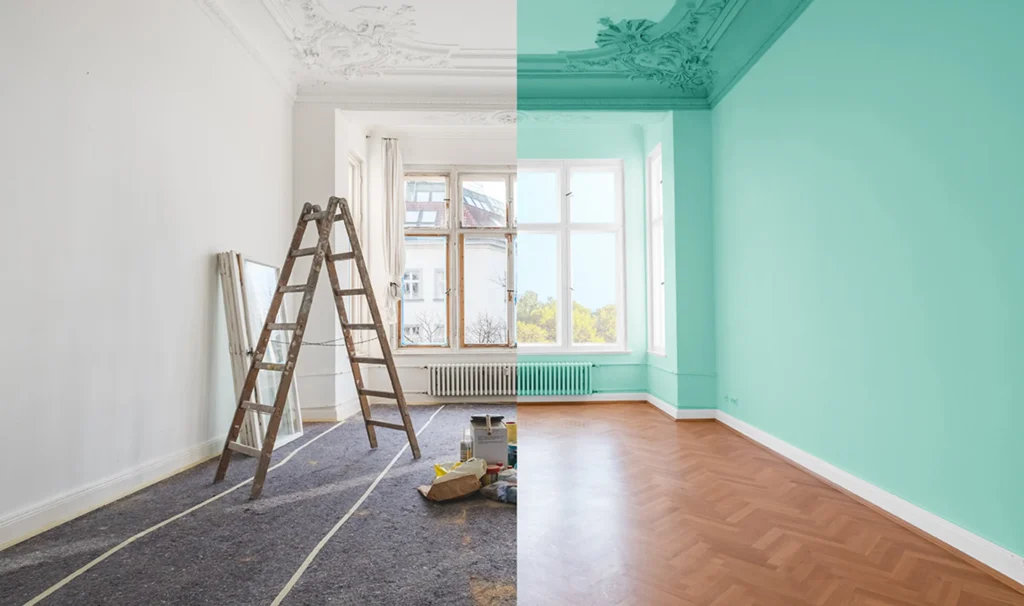
Seal Damaged or Porous Areas
For homeowners focused on deciding whether wallpaper should be removed or can be responsibly prepared for coating, Seal Damaged or Porous Areas deserves more attention than a quick visual check. A coating project is a connected system: the substrate, previous finish, moisture exposure, access, preparation, product, application, and drying conditions all influence one another. Decisions at this specific stage affect the appearance on completion day and how predictably the work performs afterward.
When reviewing Seal Damaged or Porous Areas, begin by observing the relevant surface in strong side light and under the lighting used in daily life. Record defects instead of assuming paint will hide them. Note open joints, glossy patches, stains, texture changes, loose material, previous touch-ups, and areas exposed to water or frequent handling. Photographs and a written room or elevation list turn observations about this step into a scope that a homeowner and contractor can discuss clearly.
How to evaluate this step
For Seal Damaged or Porous Areas, ask three questions: what condition exists now, what caused it, and what result is expected? The answer determines whether cleaning is enough or whether the assembly needs repair, sealing, sanding, priming, or specialist evaluation. Cosmetic work should not conceal active moisture, unstable material, or movement. When the cause is outside a painter's scope, resolving it first protects both the building and the new finish.
A professional proposal should translate the decisions surrounding Seal Damaged or Porous Areas into observable work. It should identify included surfaces, meaningful preparation, the coating category, excluded repairs, access assumptions, and the standard for completion. This detail makes estimates easier to compare and reduces changes during production. It also gives the crew a reliable plan rather than asking them to make scope decisions after rooms have already been disrupted.
Because Seal Damaged or Porous Areas will look different from one property to another, remember that Atlanta homes vary in age, construction, exposure, renovation history, and daily use. Test questionable areas, follow coating manufacturer instructions, allow required drying, and inspect before advancing. Patient sequencing at this stage is usually less costly than correcting adhesion, flashing, contamination, or visible repair edges later.
Skim and Sand Visible Transitions
For homeowners focused on deciding whether wallpaper should be removed or can be responsibly prepared for coating, Skim and Sand Visible Transitions deserves more attention than a quick visual check. A coating project is a connected system: the substrate, previous finish, moisture exposure, access, preparation, product, application, and drying conditions all influence one another. Decisions at this specific stage affect the appearance on completion day and how predictably the work performs afterward.
When reviewing Skim and Sand Visible Transitions, begin by observing the relevant surface in strong side light and under the lighting used in daily life. Record defects instead of assuming paint will hide them. Note open joints, glossy patches, stains, texture changes, loose material, previous touch-ups, and areas exposed to water or frequent handling. Photographs and a written room or elevation list turn observations about this step into a scope that a homeowner and contractor can discuss clearly.
How to evaluate this step
For Skim and Sand Visible Transitions, ask three questions: what condition exists now, what caused it, and what result is expected? The answer determines whether cleaning is enough or whether the assembly needs repair, sealing, sanding, priming, or specialist evaluation. Cosmetic work should not conceal active moisture, unstable material, or movement. When the cause is outside a painter's scope, resolving it first protects both the building and the new finish.
A professional proposal should translate the decisions surrounding Skim and Sand Visible Transitions into observable work. It should identify included surfaces, meaningful preparation, the coating category, excluded repairs, access assumptions, and the standard for completion. This detail makes estimates easier to compare and reduces changes during production. It also gives the crew a reliable plan rather than asking them to make scope decisions after rooms have already been disrupted.
Because Skim and Sand Visible Transitions will look different from one property to another, remember that Atlanta homes vary in age, construction, exposure, renovation history, and daily use. Test questionable areas, follow coating manufacturer instructions, allow required drying, and inspect before advancing. Patient sequencing at this stage is usually less costly than correcting adhesion, flashing, contamination, or visible repair edges later.

Get a Surface-Specific Recommendation
Impeccable Painting Services can inspect the conditions, define the scope, and recommend a practical next step.
Request a Free Estimate Call 770-847-2468Choose Primer for the Condition
For homeowners focused on deciding whether wallpaper should be removed or can be responsibly prepared for coating, Choose Primer for the Condition deserves more attention than a quick visual check. A coating project is a connected system: the substrate, previous finish, moisture exposure, access, preparation, product, application, and drying conditions all influence one another. Decisions at this specific stage affect the appearance on completion day and how predictably the work performs afterward.
When reviewing Choose Primer for the Condition, begin by observing the relevant surface in strong side light and under the lighting used in daily life. Record defects instead of assuming paint will hide them. Note open joints, glossy patches, stains, texture changes, loose material, previous touch-ups, and areas exposed to water or frequent handling. Photographs and a written room or elevation list turn observations about this step into a scope that a homeowner and contractor can discuss clearly.
How to evaluate this step
For Choose Primer for the Condition, ask three questions: what condition exists now, what caused it, and what result is expected? The answer determines whether cleaning is enough or whether the assembly needs repair, sealing, sanding, priming, or specialist evaluation. Cosmetic work should not conceal active moisture, unstable material, or movement. When the cause is outside a painter's scope, resolving it first protects both the building and the new finish.
A professional proposal should translate the decisions surrounding Choose Primer for the Condition into observable work. It should identify included surfaces, meaningful preparation, the coating category, excluded repairs, access assumptions, and the standard for completion. This detail makes estimates easier to compare and reduces changes during production. It also gives the crew a reliable plan rather than asking them to make scope decisions after rooms have already been disrupted.
Because Choose Primer for the Condition will look different from one property to another, remember that Atlanta homes vary in age, construction, exposure, renovation history, and daily use. Test questionable areas, follow coating manufacturer instructions, allow required drying, and inspect before advancing. Patient sequencing at this stage is usually less costly than correcting adhesion, flashing, contamination, or visible repair edges later.
Predict How Sheen Reveals Seams
For homeowners focused on deciding whether wallpaper should be removed or can be responsibly prepared for coating, Predict How Sheen Reveals Seams deserves more attention than a quick visual check. A coating project is a connected system: the substrate, previous finish, moisture exposure, access, preparation, product, application, and drying conditions all influence one another. Decisions at this specific stage affect the appearance on completion day and how predictably the work performs afterward.
When reviewing Predict How Sheen Reveals Seams, begin by observing the relevant surface in strong side light and under the lighting used in daily life. Record defects instead of assuming paint will hide them. Note open joints, glossy patches, stains, texture changes, loose material, previous touch-ups, and areas exposed to water or frequent handling. Photographs and a written room or elevation list turn observations about this step into a scope that a homeowner and contractor can discuss clearly.
How to evaluate this step
For Predict How Sheen Reveals Seams, ask three questions: what condition exists now, what caused it, and what result is expected? The answer determines whether cleaning is enough or whether the assembly needs repair, sealing, sanding, priming, or specialist evaluation. Cosmetic work should not conceal active moisture, unstable material, or movement. When the cause is outside a painter's scope, resolving it first protects both the building and the new finish.
A professional proposal should translate the decisions surrounding Predict How Sheen Reveals Seams into observable work. It should identify included surfaces, meaningful preparation, the coating category, excluded repairs, access assumptions, and the standard for completion. This detail makes estimates easier to compare and reduces changes during production. It also gives the crew a reliable plan rather than asking them to make scope decisions after rooms have already been disrupted.
Because Predict How Sheen Reveals Seams will look different from one property to another, remember that Atlanta homes vary in age, construction, exposure, renovation history, and daily use. Test questionable areas, follow coating manufacturer instructions, allow required drying, and inspect before advancing. Patient sequencing at this stage is usually less costly than correcting adhesion, flashing, contamination, or visible repair edges later.

Plan Around Trim and Built-Ins
For homeowners focused on deciding whether wallpaper should be removed or can be responsibly prepared for coating, Plan Around Trim and Built-Ins deserves more attention than a quick visual check. A coating project is a connected system: the substrate, previous finish, moisture exposure, access, preparation, product, application, and drying conditions all influence one another. Decisions at this specific stage affect the appearance on completion day and how predictably the work performs afterward.
When reviewing Plan Around Trim and Built-Ins, begin by observing the relevant surface in strong side light and under the lighting used in daily life. Record defects instead of assuming paint will hide them. Note open joints, glossy patches, stains, texture changes, loose material, previous touch-ups, and areas exposed to water or frequent handling. Photographs and a written room or elevation list turn observations about this step into a scope that a homeowner and contractor can discuss clearly.
How to evaluate this step
For Plan Around Trim and Built-Ins, ask three questions: what condition exists now, what caused it, and what result is expected? The answer determines whether cleaning is enough or whether the assembly needs repair, sealing, sanding, priming, or specialist evaluation. Cosmetic work should not conceal active moisture, unstable material, or movement. When the cause is outside a painter's scope, resolving it first protects both the building and the new finish.
A professional proposal should translate the decisions surrounding Plan Around Trim and Built-Ins into observable work. It should identify included surfaces, meaningful preparation, the coating category, excluded repairs, access assumptions, and the standard for completion. This detail makes estimates easier to compare and reduces changes during production. It also gives the crew a reliable plan rather than asking them to make scope decisions after rooms have already been disrupted.
Because Plan Around Trim and Built-Ins will look different from one property to another, remember that Atlanta homes vary in age, construction, exposure, renovation history, and daily use. Test questionable areas, follow coating manufacturer instructions, allow required drying, and inspect before advancing. Patient sequencing at this stage is usually less costly than correcting adhesion, flashing, contamination, or visible repair edges later.
Control Dust and Ventilation
For homeowners focused on deciding whether wallpaper should be removed or can be responsibly prepared for coating, Control Dust and Ventilation deserves more attention than a quick visual check. A coating project is a connected system: the substrate, previous finish, moisture exposure, access, preparation, product, application, and drying conditions all influence one another. Decisions at this specific stage affect the appearance on completion day and how predictably the work performs afterward.
When reviewing Control Dust and Ventilation, begin by observing the relevant surface in strong side light and under the lighting used in daily life. Record defects instead of assuming paint will hide them. Note open joints, glossy patches, stains, texture changes, loose material, previous touch-ups, and areas exposed to water or frequent handling. Photographs and a written room or elevation list turn observations about this step into a scope that a homeowner and contractor can discuss clearly.
How to evaluate this step
For Control Dust and Ventilation, ask three questions: what condition exists now, what caused it, and what result is expected? The answer determines whether cleaning is enough or whether the assembly needs repair, sealing, sanding, priming, or specialist evaluation. Cosmetic work should not conceal active moisture, unstable material, or movement. When the cause is outside a painter's scope, resolving it first protects both the building and the new finish.
A professional proposal should translate the decisions surrounding Control Dust and Ventilation into observable work. It should identify included surfaces, meaningful preparation, the coating category, excluded repairs, access assumptions, and the standard for completion. This detail makes estimates easier to compare and reduces changes during production. It also gives the crew a reliable plan rather than asking them to make scope decisions after rooms have already been disrupted.
Because Control Dust and Ventilation will look different from one property to another, remember that Atlanta homes vary in age, construction, exposure, renovation history, and daily use. Test questionable areas, follow coating manufacturer instructions, allow required drying, and inspect before advancing. Patient sequencing at this stage is usually less costly than correcting adhesion, flashing, contamination, or visible repair edges later.
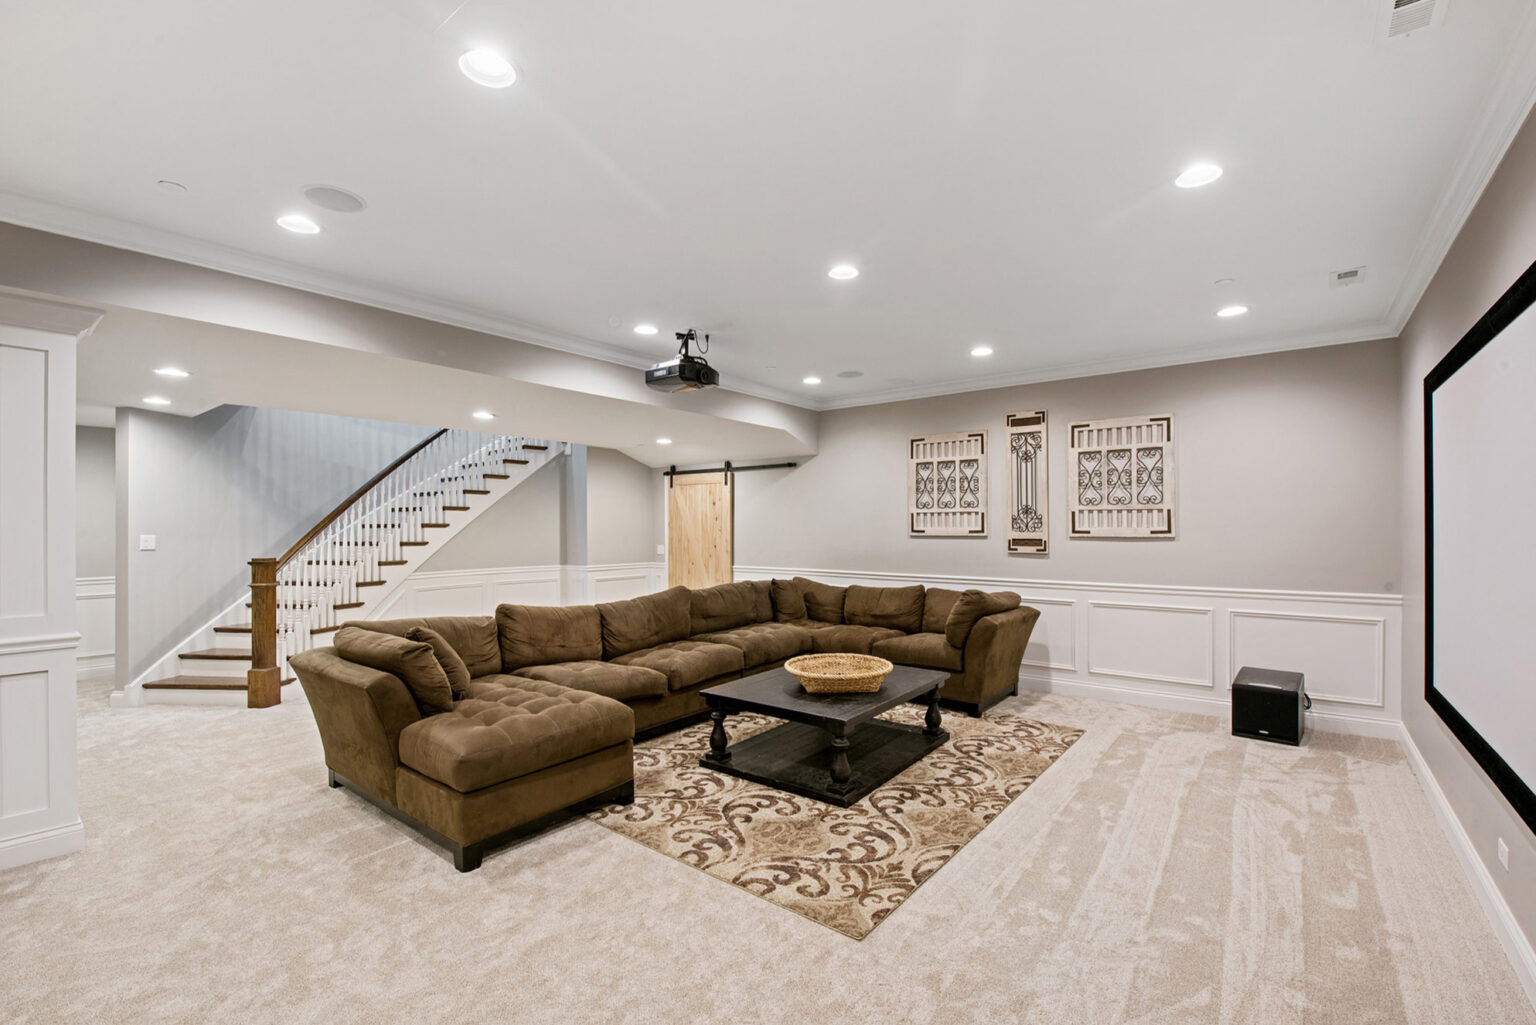
Know When Removal Is the Better Value
For homeowners focused on deciding whether wallpaper should be removed or can be responsibly prepared for coating, Know When Removal Is the Better Value deserves more attention than a quick visual check. A coating project is a connected system: the substrate, previous finish, moisture exposure, access, preparation, product, application, and drying conditions all influence one another. Decisions at this specific stage affect the appearance on completion day and how predictably the work performs afterward.
When reviewing Know When Removal Is the Better Value, begin by observing the relevant surface in strong side light and under the lighting used in daily life. Record defects instead of assuming paint will hide them. Note open joints, glossy patches, stains, texture changes, loose material, previous touch-ups, and areas exposed to water or frequent handling. Photographs and a written room or elevation list turn observations about this step into a scope that a homeowner and contractor can discuss clearly.
How to evaluate this step
For Know When Removal Is the Better Value, ask three questions: what condition exists now, what caused it, and what result is expected? The answer determines whether cleaning is enough or whether the assembly needs repair, sealing, sanding, priming, or specialist evaluation. Cosmetic work should not conceal active moisture, unstable material, or movement. When the cause is outside a painter's scope, resolving it first protects both the building and the new finish.
A professional proposal should translate the decisions surrounding Know When Removal Is the Better Value into observable work. It should identify included surfaces, meaningful preparation, the coating category, excluded repairs, access assumptions, and the standard for completion. This detail makes estimates easier to compare and reduces changes during production. It also gives the crew a reliable plan rather than asking them to make scope decisions after rooms have already been disrupted.
Because Know When Removal Is the Better Value will look different from one property to another, remember that Atlanta homes vary in age, construction, exposure, renovation history, and daily use. Test questionable areas, follow coating manufacturer instructions, allow required drying, and inspect before advancing. Patient sequencing at this stage is usually less costly than correcting adhesion, flashing, contamination, or visible repair edges later.
Turn the Plan Into a Durable Finish
Impeccable Painting Services can inspect the conditions, define the scope, and recommend a practical next step.
Request a Free Estimate Call 770-847-2468Create a Clean Painting Specification
For homeowners focused on deciding whether wallpaper should be removed or can be responsibly prepared for coating, Create a Clean Painting Specification deserves more attention than a quick visual check. A coating project is a connected system: the substrate, previous finish, moisture exposure, access, preparation, product, application, and drying conditions all influence one another. Decisions at this specific stage affect the appearance on completion day and how predictably the work performs afterward.
When reviewing Create a Clean Painting Specification, begin by observing the relevant surface in strong side light and under the lighting used in daily life. Record defects instead of assuming paint will hide them. Note open joints, glossy patches, stains, texture changes, loose material, previous touch-ups, and areas exposed to water or frequent handling. Photographs and a written room or elevation list turn observations about this step into a scope that a homeowner and contractor can discuss clearly.
How to evaluate this step
For Create a Clean Painting Specification, ask three questions: what condition exists now, what caused it, and what result is expected? The answer determines whether cleaning is enough or whether the assembly needs repair, sealing, sanding, priming, or specialist evaluation. Cosmetic work should not conceal active moisture, unstable material, or movement. When the cause is outside a painter's scope, resolving it first protects both the building and the new finish.
A professional proposal should translate the decisions surrounding Create a Clean Painting Specification into observable work. It should identify included surfaces, meaningful preparation, the coating category, excluded repairs, access assumptions, and the standard for completion. This detail makes estimates easier to compare and reduces changes during production. It also gives the crew a reliable plan rather than asking them to make scope decisions after rooms have already been disrupted.
Because Create a Clean Painting Specification will look different from one property to another, remember that Atlanta homes vary in age, construction, exposure, renovation history, and daily use. Test questionable areas, follow coating manufacturer instructions, allow required drying, and inspect before advancing. Patient sequencing at this stage is usually less costly than correcting adhesion, flashing, contamination, or visible repair edges later.
Frequently Asked Questions
Is painting over wallpaper always a bad idea?
No, but it is a risk-based decision. Stable material in limited conditions may be prepared, while loose seams, bubbles, moisture, or unknown layers favor removal.
Will wallpaper seams show through paint?
They can. Light, sheen, texture, and movement may reveal transitions even after preparation, which is why inspection and test areas are important.
Can removing wallpaper damage drywall?
Yes, especially when the wall was not properly primed before installation. Controlled removal and appropriate sealing can stabilize exposed paper or porous areas.
Should wallpaper adhesive be primed over?
Residual adhesive should be removed as completely as practical. Remaining contamination requires evaluation and a compatible sealing strategy rather than ordinary wall paint.
Who can evaluate painting over wallpaper Atlanta properties require?
Impeccable Painting Services can inspect adhesion, seams, wall condition, and finish expectations before defining removal, repair, primer, and painting scope.

About Impeccable Painting Services
We serve Metro Atlanta with interior and exterior painting, cabinets, doors, basements, drywall repair, wallpaper removal, and specialty surface preparation. Explore our service areas or contact our team.
Sources: U.S. EPA: Renovation, Repair and Painting Program; U.S. EPA: VOCs and indoor air quality; coating product labels and manufacturer technical data should govern application-specific decisions.
Cabinet Paint Finish Atlanta: How Professional Results Are Built
Learn what separates a furniture-like cabinet coating from ordinary wall paint applied to doors.
Learn what separates a furniture-like cabinet coating from ordinary wall paint applied to doors. This guide explains selecting and producing a durable professional coating system for painted kitchen cabinets through a practical sequence built around real surfaces, clear scope, and durable results.
cabinet paint finish Atlanta: The Practical Answer
The dependable approach is to inspect before specifying, correct causes before cosmetics, and define the complete coating system before production. A useful plan connects surface condition, preparation, access, product, application, curing, and maintenance instead of treating paint as a decorative layer alone.
Impeccable Painting Services helps Metro Atlanta homeowners coordinate cabinet painting, related repairs, and clean project logistics. Review our project gallery, learn about our painting company, or request an on-site estimate.
cabinet paint finish Atlanta: Define the Desired Cabinet Result
For homeowners focused on selecting and producing a durable professional coating system for painted kitchen cabinets, Define the Desired Cabinet Result deserves more attention than a quick visual check. A coating project is a connected system: the substrate, previous finish, moisture exposure, access, preparation, product, application, and drying conditions all influence one another. Decisions at this specific stage affect the appearance on completion day and how predictably the work performs afterward.
When reviewing Define the Desired Cabinet Result, begin by observing the relevant surface in strong side light and under the lighting used in daily life. Record defects instead of assuming paint will hide them. Note open joints, glossy patches, stains, texture changes, loose material, previous touch-ups, and areas exposed to water or frequent handling. Photographs and a written room or elevation list turn observations about this step into a scope that a homeowner and contractor can discuss clearly.
How to evaluate this step
For Define the Desired Cabinet Result, ask three questions: what condition exists now, what caused it, and what result is expected? The answer determines whether cleaning is enough or whether the assembly needs repair, sealing, sanding, priming, or specialist evaluation. Cosmetic work should not conceal active moisture, unstable material, or movement. When the cause is outside a painter's scope, resolving it first protects both the building and the new finish.
A professional proposal should translate the decisions surrounding Define the Desired Cabinet Result into observable work. It should identify included surfaces, meaningful preparation, the coating category, excluded repairs, access assumptions, and the standard for completion. This detail makes estimates easier to compare and reduces changes during production. It also gives the crew a reliable plan rather than asking them to make scope decisions after rooms have already been disrupted.
Because Define the Desired Cabinet Result will look different from one property to another, remember that Atlanta homes vary in age, construction, exposure, renovation history, and daily use. Test questionable areas, follow coating manufacturer instructions, allow required drying, and inspect before advancing. Patient sequencing at this stage is usually less costly than correcting adhesion, flashing, contamination, or visible repair edges later.
Evaluate the Existing Cabinet Material
For homeowners focused on selecting and producing a durable professional coating system for painted kitchen cabinets, Evaluate the Existing Cabinet Material deserves more attention than a quick visual check. A coating project is a connected system: the substrate, previous finish, moisture exposure, access, preparation, product, application, and drying conditions all influence one another. Decisions at this specific stage affect the appearance on completion day and how predictably the work performs afterward.
When reviewing Evaluate the Existing Cabinet Material, begin by observing the relevant surface in strong side light and under the lighting used in daily life. Record defects instead of assuming paint will hide them. Note open joints, glossy patches, stains, texture changes, loose material, previous touch-ups, and areas exposed to water or frequent handling. Photographs and a written room or elevation list turn observations about this step into a scope that a homeowner and contractor can discuss clearly.
How to evaluate this step
For Evaluate the Existing Cabinet Material, ask three questions: what condition exists now, what caused it, and what result is expected? The answer determines whether cleaning is enough or whether the assembly needs repair, sealing, sanding, priming, or specialist evaluation. Cosmetic work should not conceal active moisture, unstable material, or movement. When the cause is outside a painter's scope, resolving it first protects both the building and the new finish.
A professional proposal should translate the decisions surrounding Evaluate the Existing Cabinet Material into observable work. It should identify included surfaces, meaningful preparation, the coating category, excluded repairs, access assumptions, and the standard for completion. This detail makes estimates easier to compare and reduces changes during production. It also gives the crew a reliable plan rather than asking them to make scope decisions after rooms have already been disrupted.
Because Evaluate the Existing Cabinet Material will look different from one property to another, remember that Atlanta homes vary in age, construction, exposure, renovation history, and daily use. Test questionable areas, follow coating manufacturer instructions, allow required drying, and inspect before advancing. Patient sequencing at this stage is usually less costly than correcting adhesion, flashing, contamination, or visible repair edges later.

Check Previous Coatings and Contamination
For homeowners focused on selecting and producing a durable professional coating system for painted kitchen cabinets, Check Previous Coatings and Contamination deserves more attention than a quick visual check. A coating project is a connected system: the substrate, previous finish, moisture exposure, access, preparation, product, application, and drying conditions all influence one another. Decisions at this specific stage affect the appearance on completion day and how predictably the work performs afterward.
When reviewing Check Previous Coatings and Contamination, begin by observing the relevant surface in strong side light and under the lighting used in daily life. Record defects instead of assuming paint will hide them. Note open joints, glossy patches, stains, texture changes, loose material, previous touch-ups, and areas exposed to water or frequent handling. Photographs and a written room or elevation list turn observations about this step into a scope that a homeowner and contractor can discuss clearly.
How to evaluate this step
For Check Previous Coatings and Contamination, ask three questions: what condition exists now, what caused it, and what result is expected? The answer determines whether cleaning is enough or whether the assembly needs repair, sealing, sanding, priming, or specialist evaluation. Cosmetic work should not conceal active moisture, unstable material, or movement. When the cause is outside a painter's scope, resolving it first protects both the building and the new finish.
A professional proposal should translate the decisions surrounding Check Previous Coatings and Contamination into observable work. It should identify included surfaces, meaningful preparation, the coating category, excluded repairs, access assumptions, and the standard for completion. This detail makes estimates easier to compare and reduces changes during production. It also gives the crew a reliable plan rather than asking them to make scope decisions after rooms have already been disrupted.
Because Check Previous Coatings and Contamination will look different from one property to another, remember that Atlanta homes vary in age, construction, exposure, renovation history, and daily use. Test questionable areas, follow coating manufacturer instructions, allow required drying, and inspect before advancing. Patient sequencing at this stage is usually less costly than correcting adhesion, flashing, contamination, or visible repair edges later.
Create a Door and Hardware Map
For homeowners focused on selecting and producing a durable professional coating system for painted kitchen cabinets, Create a Door and Hardware Map deserves more attention than a quick visual check. A coating project is a connected system: the substrate, previous finish, moisture exposure, access, preparation, product, application, and drying conditions all influence one another. Decisions at this specific stage affect the appearance on completion day and how predictably the work performs afterward.
When reviewing Create a Door and Hardware Map, begin by observing the relevant surface in strong side light and under the lighting used in daily life. Record defects instead of assuming paint will hide them. Note open joints, glossy patches, stains, texture changes, loose material, previous touch-ups, and areas exposed to water or frequent handling. Photographs and a written room or elevation list turn observations about this step into a scope that a homeowner and contractor can discuss clearly.
How to evaluate this step
For Create a Door and Hardware Map, ask three questions: what condition exists now, what caused it, and what result is expected? The answer determines whether cleaning is enough or whether the assembly needs repair, sealing, sanding, priming, or specialist evaluation. Cosmetic work should not conceal active moisture, unstable material, or movement. When the cause is outside a painter's scope, resolving it first protects both the building and the new finish.
A professional proposal should translate the decisions surrounding Create a Door and Hardware Map into observable work. It should identify included surfaces, meaningful preparation, the coating category, excluded repairs, access assumptions, and the standard for completion. This detail makes estimates easier to compare and reduces changes during production. It also gives the crew a reliable plan rather than asking them to make scope decisions after rooms have already been disrupted.
Because Create a Door and Hardware Map will look different from one property to another, remember that Atlanta homes vary in age, construction, exposure, renovation history, and daily use. Test questionable areas, follow coating manufacturer instructions, allow required drying, and inspect before advancing. Patient sequencing at this stage is usually less costly than correcting adhesion, flashing, contamination, or visible repair edges later.

Degrease Before Abrasion
For homeowners focused on selecting and producing a durable professional coating system for painted kitchen cabinets, Degrease Before Abrasion deserves more attention than a quick visual check. A coating project is a connected system: the substrate, previous finish, moisture exposure, access, preparation, product, application, and drying conditions all influence one another. Decisions at this specific stage affect the appearance on completion day and how predictably the work performs afterward.
When reviewing Degrease Before Abrasion, begin by observing the relevant surface in strong side light and under the lighting used in daily life. Record defects instead of assuming paint will hide them. Note open joints, glossy patches, stains, texture changes, loose material, previous touch-ups, and areas exposed to water or frequent handling. Photographs and a written room or elevation list turn observations about this step into a scope that a homeowner and contractor can discuss clearly.
How to evaluate this step
For Degrease Before Abrasion, ask three questions: what condition exists now, what caused it, and what result is expected? The answer determines whether cleaning is enough or whether the assembly needs repair, sealing, sanding, priming, or specialist evaluation. Cosmetic work should not conceal active moisture, unstable material, or movement. When the cause is outside a painter's scope, resolving it first protects both the building and the new finish.
A professional proposal should translate the decisions surrounding Degrease Before Abrasion into observable work. It should identify included surfaces, meaningful preparation, the coating category, excluded repairs, access assumptions, and the standard for completion. This detail makes estimates easier to compare and reduces changes during production. It also gives the crew a reliable plan rather than asking them to make scope decisions after rooms have already been disrupted.
Because Degrease Before Abrasion will look different from one property to another, remember that Atlanta homes vary in age, construction, exposure, renovation history, and daily use. Test questionable areas, follow coating manufacturer instructions, allow required drying, and inspect before advancing. Patient sequencing at this stage is usually less costly than correcting adhesion, flashing, contamination, or visible repair edges later.
Plan Your Project With Confidence
Impeccable Painting Services can inspect the conditions, define the scope, and recommend a practical next step.
Request a Free Estimate Call 770-847-2468Repair Dents, Open Seams, and Damage
For homeowners focused on selecting and producing a durable professional coating system for painted kitchen cabinets, Repair Dents, Open Seams, and Damage deserves more attention than a quick visual check. A coating project is a connected system: the substrate, previous finish, moisture exposure, access, preparation, product, application, and drying conditions all influence one another. Decisions at this specific stage affect the appearance on completion day and how predictably the work performs afterward.
When reviewing Repair Dents, Open Seams, and Damage, begin by observing the relevant surface in strong side light and under the lighting used in daily life. Record defects instead of assuming paint will hide them. Note open joints, glossy patches, stains, texture changes, loose material, previous touch-ups, and areas exposed to water or frequent handling. Photographs and a written room or elevation list turn observations about this step into a scope that a homeowner and contractor can discuss clearly.
A Practical cabinet paint finish Atlanta Decision Framework
For Repair Dents, Open Seams, and Damage, ask three questions: what condition exists now, what caused it, and what result is expected? The answer determines whether cleaning is enough or whether the assembly needs repair, sealing, sanding, priming, or specialist evaluation. Cosmetic work should not conceal active moisture, unstable material, or movement. When the cause is outside a painter's scope, resolving it first protects both the building and the new finish.
A professional proposal should translate the decisions surrounding Repair Dents, Open Seams, and Damage into observable work. It should identify included surfaces, meaningful preparation, the coating category, excluded repairs, access assumptions, and the standard for completion. This detail makes estimates easier to compare and reduces changes during production. It also gives the crew a reliable plan rather than asking them to make scope decisions after rooms have already been disrupted.
Because Repair Dents, Open Seams, and Damage will look different from one property to another, remember that Atlanta homes vary in age, construction, exposure, renovation history, and daily use. Test questionable areas, follow coating manufacturer instructions, allow required drying, and inspect before advancing. Patient sequencing at this stage is usually less costly than correcting adhesion, flashing, contamination, or visible repair edges later.

Sand for Adhesion and Smoothness
For homeowners focused on selecting and producing a durable professional coating system for painted kitchen cabinets, Sand for Adhesion and Smoothness deserves more attention than a quick visual check. A coating project is a connected system: the substrate, previous finish, moisture exposure, access, preparation, product, application, and drying conditions all influence one another. Decisions at this specific stage affect the appearance on completion day and how predictably the work performs afterward.
When reviewing Sand for Adhesion and Smoothness, begin by observing the relevant surface in strong side light and under the lighting used in daily life. Record defects instead of assuming paint will hide them. Note open joints, glossy patches, stains, texture changes, loose material, previous touch-ups, and areas exposed to water or frequent handling. Photographs and a written room or elevation list turn observations about this step into a scope that a homeowner and contractor can discuss clearly.
How to evaluate this step
For Sand for Adhesion and Smoothness, ask three questions: what condition exists now, what caused it, and what result is expected? The answer determines whether cleaning is enough or whether the assembly needs repair, sealing, sanding, priming, or specialist evaluation. Cosmetic work should not conceal active moisture, unstable material, or movement. When the cause is outside a painter's scope, resolving it first protects both the building and the new finish.
A professional proposal should translate the decisions surrounding Sand for Adhesion and Smoothness into observable work. It should identify included surfaces, meaningful preparation, the coating category, excluded repairs, access assumptions, and the standard for completion. This detail makes estimates easier to compare and reduces changes during production. It also gives the crew a reliable plan rather than asking them to make scope decisions after rooms have already been disrupted.
Because Sand for Adhesion and Smoothness will look different from one property to another, remember that Atlanta homes vary in age, construction, exposure, renovation history, and daily use. Test questionable areas, follow coating manufacturer instructions, allow required drying, and inspect before advancing. Patient sequencing at this stage is usually less costly than correcting adhesion, flashing, contamination, or visible repair edges later.
Choose a Compatible Primer
For homeowners focused on selecting and producing a durable professional coating system for painted kitchen cabinets, Choose a Compatible Primer deserves more attention than a quick visual check. A coating project is a connected system: the substrate, previous finish, moisture exposure, access, preparation, product, application, and drying conditions all influence one another. Decisions at this specific stage affect the appearance on completion day and how predictably the work performs afterward.
When reviewing Choose a Compatible Primer, begin by observing the relevant surface in strong side light and under the lighting used in daily life. Record defects instead of assuming paint will hide them. Note open joints, glossy patches, stains, texture changes, loose material, previous touch-ups, and areas exposed to water or frequent handling. Photographs and a written room or elevation list turn observations about this step into a scope that a homeowner and contractor can discuss clearly.
How to evaluate this step
For Choose a Compatible Primer, ask three questions: what condition exists now, what caused it, and what result is expected? The answer determines whether cleaning is enough or whether the assembly needs repair, sealing, sanding, priming, or specialist evaluation. Cosmetic work should not conceal active moisture, unstable material, or movement. When the cause is outside a painter's scope, resolving it first protects both the building and the new finish.
A professional proposal should translate the decisions surrounding Choose a Compatible Primer into observable work. It should identify included surfaces, meaningful preparation, the coating category, excluded repairs, access assumptions, and the standard for completion. This detail makes estimates easier to compare and reduces changes during production. It also gives the crew a reliable plan rather than asking them to make scope decisions after rooms have already been disrupted.
Because Choose a Compatible Primer will look different from one property to another, remember that Atlanta homes vary in age, construction, exposure, renovation history, and daily use. Test questionable areas, follow coating manufacturer instructions, allow required drying, and inspect before advancing. Patient sequencing at this stage is usually less costly than correcting adhesion, flashing, contamination, or visible repair edges later.

Select a Cabinet-Specific Topcoat
For homeowners focused on selecting and producing a durable professional coating system for painted kitchen cabinets, Select a Cabinet-Specific Topcoat deserves more attention than a quick visual check. A coating project is a connected system: the substrate, previous finish, moisture exposure, access, preparation, product, application, and drying conditions all influence one another. Decisions at this specific stage affect the appearance on completion day and how predictably the work performs afterward.
When reviewing Select a Cabinet-Specific Topcoat, begin by observing the relevant surface in strong side light and under the lighting used in daily life. Record defects instead of assuming paint will hide them. Note open joints, glossy patches, stains, texture changes, loose material, previous touch-ups, and areas exposed to water or frequent handling. Photographs and a written room or elevation list turn observations about this step into a scope that a homeowner and contractor can discuss clearly.
How to evaluate this step
For Select a Cabinet-Specific Topcoat, ask three questions: what condition exists now, what caused it, and what result is expected? The answer determines whether cleaning is enough or whether the assembly needs repair, sealing, sanding, priming, or specialist evaluation. Cosmetic work should not conceal active moisture, unstable material, or movement. When the cause is outside a painter's scope, resolving it first protects both the building and the new finish.
A professional proposal should translate the decisions surrounding Select a Cabinet-Specific Topcoat into observable work. It should identify included surfaces, meaningful preparation, the coating category, excluded repairs, access assumptions, and the standard for completion. This detail makes estimates easier to compare and reduces changes during production. It also gives the crew a reliable plan rather than asking them to make scope decisions after rooms have already been disrupted.
Because Select a Cabinet-Specific Topcoat will look different from one property to another, remember that Atlanta homes vary in age, construction, exposure, renovation history, and daily use. Test questionable areas, follow coating manufacturer instructions, allow required drying, and inspect before advancing. Patient sequencing at this stage is usually less costly than correcting adhesion, flashing, contamination, or visible repair edges later.
Understand Sheen and Reflection
For homeowners focused on selecting and producing a durable professional coating system for painted kitchen cabinets, Understand Sheen and Reflection deserves more attention than a quick visual check. A coating project is a connected system: the substrate, previous finish, moisture exposure, access, preparation, product, application, and drying conditions all influence one another. Decisions at this specific stage affect the appearance on completion day and how predictably the work performs afterward.
When reviewing Understand Sheen and Reflection, begin by observing the relevant surface in strong side light and under the lighting used in daily life. Record defects instead of assuming paint will hide them. Note open joints, glossy patches, stains, texture changes, loose material, previous touch-ups, and areas exposed to water or frequent handling. Photographs and a written room or elevation list turn observations about this step into a scope that a homeowner and contractor can discuss clearly.
How to evaluate this step
For Understand Sheen and Reflection, ask three questions: what condition exists now, what caused it, and what result is expected? The answer determines whether cleaning is enough or whether the assembly needs repair, sealing, sanding, priming, or specialist evaluation. Cosmetic work should not conceal active moisture, unstable material, or movement. When the cause is outside a painter's scope, resolving it first protects both the building and the new finish.
A professional proposal should translate the decisions surrounding Understand Sheen and Reflection into observable work. It should identify included surfaces, meaningful preparation, the coating category, excluded repairs, access assumptions, and the standard for completion. This detail makes estimates easier to compare and reduces changes during production. It also gives the crew a reliable plan rather than asking them to make scope decisions after rooms have already been disrupted.
Because Understand Sheen and Reflection will look different from one property to another, remember that Atlanta homes vary in age, construction, exposure, renovation history, and daily use. Test questionable areas, follow coating manufacturer instructions, allow required drying, and inspect before advancing. Patient sequencing at this stage is usually less costly than correcting adhesion, flashing, contamination, or visible repair edges later.

Get a Surface-Specific Recommendation
Impeccable Painting Services can inspect the conditions, define the scope, and recommend a practical next step.
Request a Free Estimate Call 770-847-2468Plan Color With Counters and Floors
For homeowners focused on selecting and producing a durable professional coating system for painted kitchen cabinets, Plan Color With Counters and Floors deserves more attention than a quick visual check. A coating project is a connected system: the substrate, previous finish, moisture exposure, access, preparation, product, application, and drying conditions all influence one another. Decisions at this specific stage affect the appearance on completion day and how predictably the work performs afterward.
When reviewing Plan Color With Counters and Floors, begin by observing the relevant surface in strong side light and under the lighting used in daily life. Record defects instead of assuming paint will hide them. Note open joints, glossy patches, stains, texture changes, loose material, previous touch-ups, and areas exposed to water or frequent handling. Photographs and a written room or elevation list turn observations about this step into a scope that a homeowner and contractor can discuss clearly.
How to evaluate this step
For Plan Color With Counters and Floors, ask three questions: what condition exists now, what caused it, and what result is expected? The answer determines whether cleaning is enough or whether the assembly needs repair, sealing, sanding, priming, or specialist evaluation. Cosmetic work should not conceal active moisture, unstable material, or movement. When the cause is outside a painter's scope, resolving it first protects both the building and the new finish.
A professional proposal should translate the decisions surrounding Plan Color With Counters and Floors into observable work. It should identify included surfaces, meaningful preparation, the coating category, excluded repairs, access assumptions, and the standard for completion. This detail makes estimates easier to compare and reduces changes during production. It also gives the crew a reliable plan rather than asking them to make scope decisions after rooms have already been disrupted.
Because Plan Color With Counters and Floors will look different from one property to another, remember that Atlanta homes vary in age, construction, exposure, renovation history, and daily use. Test questionable areas, follow coating manufacturer instructions, allow required drying, and inspect before advancing. Patient sequencing at this stage is usually less costly than correcting adhesion, flashing, contamination, or visible repair edges later.
Control Dust During Application
For homeowners focused on selecting and producing a durable professional coating system for painted kitchen cabinets, Control Dust During Application deserves more attention than a quick visual check. A coating project is a connected system: the substrate, previous finish, moisture exposure, access, preparation, product, application, and drying conditions all influence one another. Decisions at this specific stage affect the appearance on completion day and how predictably the work performs afterward.
When reviewing Control Dust During Application, begin by observing the relevant surface in strong side light and under the lighting used in daily life. Record defects instead of assuming paint will hide them. Note open joints, glossy patches, stains, texture changes, loose material, previous touch-ups, and areas exposed to water or frequent handling. Photographs and a written room or elevation list turn observations about this step into a scope that a homeowner and contractor can discuss clearly.
How to evaluate this step
For Control Dust During Application, ask three questions: what condition exists now, what caused it, and what result is expected? The answer determines whether cleaning is enough or whether the assembly needs repair, sealing, sanding, priming, or specialist evaluation. Cosmetic work should not conceal active moisture, unstable material, or movement. When the cause is outside a painter's scope, resolving it first protects both the building and the new finish.
A professional proposal should translate the decisions surrounding Control Dust During Application into observable work. It should identify included surfaces, meaningful preparation, the coating category, excluded repairs, access assumptions, and the standard for completion. This detail makes estimates easier to compare and reduces changes during production. It also gives the crew a reliable plan rather than asking them to make scope decisions after rooms have already been disrupted.
Because Control Dust During Application will look different from one property to another, remember that Atlanta homes vary in age, construction, exposure, renovation history, and daily use. Test questionable areas, follow coating manufacturer instructions, allow required drying, and inspect before advancing. Patient sequencing at this stage is usually less costly than correcting adhesion, flashing, contamination, or visible repair edges later.
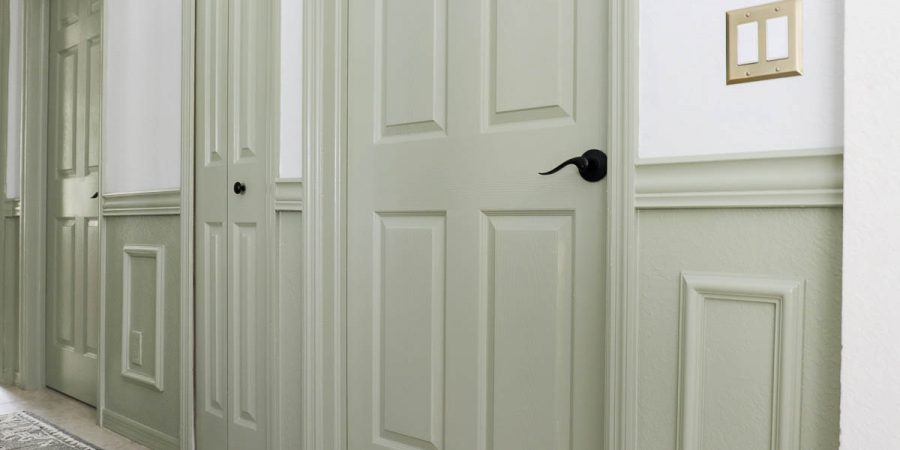
Respect Recoat and Cure Times
For homeowners focused on selecting and producing a durable professional coating system for painted kitchen cabinets, Respect Recoat and Cure Times deserves more attention than a quick visual check. A coating project is a connected system: the substrate, previous finish, moisture exposure, access, preparation, product, application, and drying conditions all influence one another. Decisions at this specific stage affect the appearance on completion day and how predictably the work performs afterward.
When reviewing Respect Recoat and Cure Times, begin by observing the relevant surface in strong side light and under the lighting used in daily life. Record defects instead of assuming paint will hide them. Note open joints, glossy patches, stains, texture changes, loose material, previous touch-ups, and areas exposed to water or frequent handling. Photographs and a written room or elevation list turn observations about this step into a scope that a homeowner and contractor can discuss clearly.
How to evaluate this step
For Respect Recoat and Cure Times, ask three questions: what condition exists now, what caused it, and what result is expected? The answer determines whether cleaning is enough or whether the assembly needs repair, sealing, sanding, priming, or specialist evaluation. Cosmetic work should not conceal active moisture, unstable material, or movement. When the cause is outside a painter's scope, resolving it first protects both the building and the new finish.
A professional proposal should translate the decisions surrounding Respect Recoat and Cure Times into observable work. It should identify included surfaces, meaningful preparation, the coating category, excluded repairs, access assumptions, and the standard for completion. This detail makes estimates easier to compare and reduces changes during production. It also gives the crew a reliable plan rather than asking them to make scope decisions after rooms have already been disrupted.
Because Respect Recoat and Cure Times will look different from one property to another, remember that Atlanta homes vary in age, construction, exposure, renovation history, and daily use. Test questionable areas, follow coating manufacturer instructions, allow required drying, and inspect before advancing. Patient sequencing at this stage is usually less costly than correcting adhesion, flashing, contamination, or visible repair edges later.
Protect the Kitchen During Production
For homeowners focused on selecting and producing a durable professional coating system for painted kitchen cabinets, Protect the Kitchen During Production deserves more attention than a quick visual check. A coating project is a connected system: the substrate, previous finish, moisture exposure, access, preparation, product, application, and drying conditions all influence one another. Decisions at this specific stage affect the appearance on completion day and how predictably the work performs afterward.
When reviewing Protect the Kitchen During Production, begin by observing the relevant surface in strong side light and under the lighting used in daily life. Record defects instead of assuming paint will hide them. Note open joints, glossy patches, stains, texture changes, loose material, previous touch-ups, and areas exposed to water or frequent handling. Photographs and a written room or elevation list turn observations about this step into a scope that a homeowner and contractor can discuss clearly.
How to evaluate this step
For Protect the Kitchen During Production, ask three questions: what condition exists now, what caused it, and what result is expected? The answer determines whether cleaning is enough or whether the assembly needs repair, sealing, sanding, priming, or specialist evaluation. Cosmetic work should not conceal active moisture, unstable material, or movement. When the cause is outside a painter's scope, resolving it first protects both the building and the new finish.
A professional proposal should translate the decisions surrounding Protect the Kitchen During Production into observable work. It should identify included surfaces, meaningful preparation, the coating category, excluded repairs, access assumptions, and the standard for completion. This detail makes estimates easier to compare and reduces changes during production. It also gives the crew a reliable plan rather than asking them to make scope decisions after rooms have already been disrupted.
Because Protect the Kitchen During Production will look different from one property to another, remember that Atlanta homes vary in age, construction, exposure, renovation history, and daily use. Test questionable areas, follow coating manufacturer instructions, allow required drying, and inspect before advancing. Patient sequencing at this stage is usually less costly than correcting adhesion, flashing, contamination, or visible repair edges later.
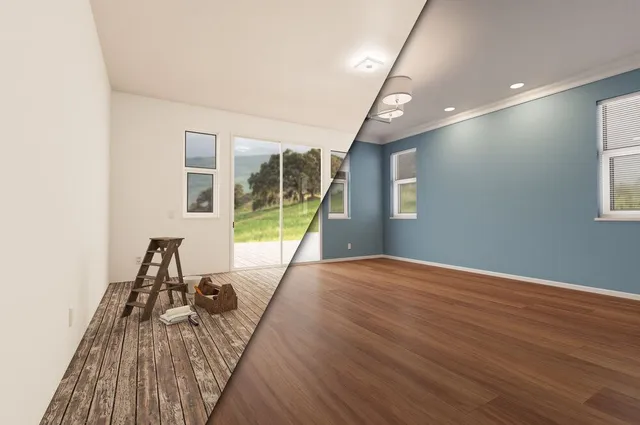
Clean Painted Cabinets Correctly
For homeowners focused on selecting and producing a durable professional coating system for painted kitchen cabinets, Clean Painted Cabinets Correctly deserves more attention than a quick visual check. A coating project is a connected system: the substrate, previous finish, moisture exposure, access, preparation, product, application, and drying conditions all influence one another. Decisions at this specific stage affect the appearance on completion day and how predictably the work performs afterward.
When reviewing Clean Painted Cabinets Correctly, begin by observing the relevant surface in strong side light and under the lighting used in daily life. Record defects instead of assuming paint will hide them. Note open joints, glossy patches, stains, texture changes, loose material, previous touch-ups, and areas exposed to water or frequent handling. Photographs and a written room or elevation list turn observations about this step into a scope that a homeowner and contractor can discuss clearly.
How to evaluate this step
For Clean Painted Cabinets Correctly, ask three questions: what condition exists now, what caused it, and what result is expected? The answer determines whether cleaning is enough or whether the assembly needs repair, sealing, sanding, priming, or specialist evaluation. Cosmetic work should not conceal active moisture, unstable material, or movement. When the cause is outside a painter's scope, resolving it first protects both the building and the new finish.
A professional proposal should translate the decisions surrounding Clean Painted Cabinets Correctly into observable work. It should identify included surfaces, meaningful preparation, the coating category, excluded repairs, access assumptions, and the standard for completion. This detail makes estimates easier to compare and reduces changes during production. It also gives the crew a reliable plan rather than asking them to make scope decisions after rooms have already been disrupted.
Because Clean Painted Cabinets Correctly will look different from one property to another, remember that Atlanta homes vary in age, construction, exposure, renovation history, and daily use. Test questionable areas, follow coating manufacturer instructions, allow required drying, and inspect before advancing. Patient sequencing at this stage is usually less costly than correcting adhesion, flashing, contamination, or visible repair edges later.
Turn the Plan Into a Durable Finish
Impeccable Painting Services can inspect the conditions, define the scope, and recommend a practical next step.
Request a Free Estimate Call 770-847-2468Decide When Refinishing Makes Sense
For homeowners focused on selecting and producing a durable professional coating system for painted kitchen cabinets, Decide When Refinishing Makes Sense deserves more attention than a quick visual check. A coating project is a connected system: the substrate, previous finish, moisture exposure, access, preparation, product, application, and drying conditions all influence one another. Decisions at this specific stage affect the appearance on completion day and how predictably the work performs afterward.
When reviewing Decide When Refinishing Makes Sense, begin by observing the relevant surface in strong side light and under the lighting used in daily life. Record defects instead of assuming paint will hide them. Note open joints, glossy patches, stains, texture changes, loose material, previous touch-ups, and areas exposed to water or frequent handling. Photographs and a written room or elevation list turn observations about this step into a scope that a homeowner and contractor can discuss clearly.
How to evaluate this step
For Decide When Refinishing Makes Sense, ask three questions: what condition exists now, what caused it, and what result is expected? The answer determines whether cleaning is enough or whether the assembly needs repair, sealing, sanding, priming, or specialist evaluation. Cosmetic work should not conceal active moisture, unstable material, or movement. When the cause is outside a painter's scope, resolving it first protects both the building and the new finish.
A professional proposal should translate the decisions surrounding Decide When Refinishing Makes Sense into observable work. It should identify included surfaces, meaningful preparation, the coating category, excluded repairs, access assumptions, and the standard for completion. This detail makes estimates easier to compare and reduces changes during production. It also gives the crew a reliable plan rather than asking them to make scope decisions after rooms have already been disrupted.
Because Decide When Refinishing Makes Sense will look different from one property to another, remember that Atlanta homes vary in age, construction, exposure, renovation history, and daily use. Test questionable areas, follow coating manufacturer instructions, allow required drying, and inspect before advancing. Patient sequencing at this stage is usually less costly than correcting adhesion, flashing, contamination, or visible repair edges later.
Frequently Asked Questions
What sheen is best for painted kitchen cabinets?
A durable satin or semi-gloss is common, but product performance matters more than the sheen name. Evaluate cleaning needs, surface condition, and desired reflection.
Can cabinets be painted without sanding?
Some systems use bonding products, but cleaning, deglossing, and appropriate surface preparation remain essential. A shortcut should never replace adhesion testing.
How long before painted cabinets fully cure?
Cure time varies by coating and conditions. Doors may feel dry before reaching full hardness, so gentle use and the manufacturer’s instructions are important.
Can oak grain be hidden when cabinets are painted?
Grain can be reduced with additional filling and preparation, but that changes labor and scope. Some homeowners intentionally retain subtle grain as part of the material character.
What makes a cabinet paint finish Atlanta kitchens can depend on?
Thorough cleaning, controlled preparation, compatible primer, cabinet-grade topcoat, disciplined application, and adequate cure time work together.
About Impeccable Painting Services
We serve Metro Atlanta with interior and exterior painting, cabinets, doors, basements, drywall repair, wallpaper removal, and specialty surface preparation. Explore our service areas or contact our team.
Sources: U.S. EPA: Renovation, Repair and Painting Program; U.S. EPA: VOCs and indoor air quality; coating product labels and manufacturer technical data should govern application-specific decisions.